I work on several applications that use Redis. In production those applications all use six node Redis clusters that run on Linux. However, my developer workstation is a Windows 10 machine on which I only have a single node instance of Redis running. I really wanted to have a six node Redis cluster to test against in my Windows 10 development environment, the problem is that the utilities that come with Redis that allow you to setup a multiple node test cluster on a single machine, are all written to work on Linux.
Since I can’t do anything about the fact that my workstation is a Windows 10 machine, it turns out the solution was quite simple, use the Ubuntu subsystem.
In this article I will walk you through setting up a six node Redis test cluster running on Windows 10 using the Ubuntu subsystem.
Install Ubuntu Subsystem
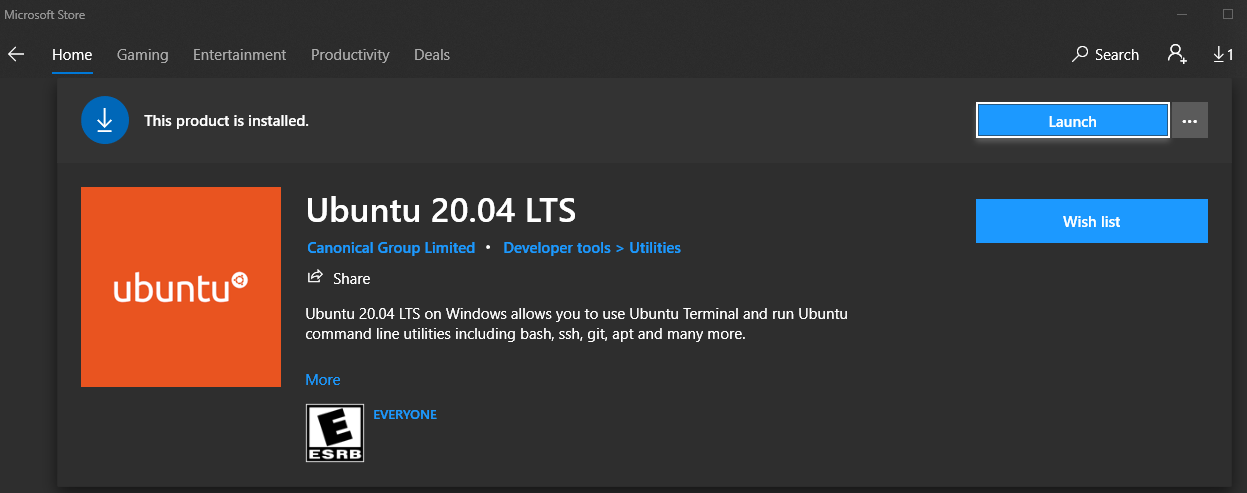
The first step is to go to the Windows Store, search for Ubuntu, and when you find the latest version of the Ubuntu App install it:
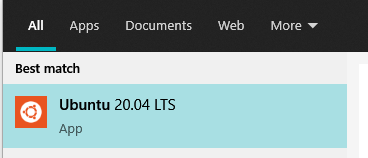
Once the Ubuntu subsystem is installed, you can launch the app from the windows start menu by typing “Ubuntu”:
Install Redis on Ubuntu
Fix SSL Issue
One issue you may run into when trying to download Ruby packages from within the Ubuntu subsystem is an SSL issue. The solution is to run the following commands:
First, remove the source if it exists:
gem sources -r https://rubygems.org/
Second, add the source again but with “http”:
gem sources -a http://rubygems.org/
Install Redis
Ensure all packages are up to date:
apt-get update
Install Ruby:
apt-get install ruby
Download Redis:
wget https://download.redis.io/releases/redis-5.0.12.tar.gz --no-check-certificate
Unzip the package into the /opt folder:
tar -zxvf redis-5.0.12.tar.gz /opt
Navigate to the Redis folder:
cd /opt/redis-5.0.12
Build the Redis executable:
apt install make

apt install make-guile

apt install gcc

apt install build-essential

make MALLOC=libc

apt install redis-tools
Create Redis Cluster
Navigate to the “create-cluster” folder:
cd /opt/redis-5.0.12/utils/create-cluster
Edit the “create-cluster” script:
vi create-cluster
Modify the cluster start port from “PORT=30000” to be “PORT=7000”:
#!/bin/bash

# Settings
PORT=7000
TIMEOUT=2000
NODES=6
REPLICAS=1
Note: This is a personal preference, to have the starting port set to 7000, so it is up to you if you want to change it or not.
Start the six nodes:
./create-cluster start
When the six nodes are started, the ports 7001 to 7006 will be used.
Starting 7001
Starting 7002
Starting 7003
Starting 7004
Starting 7005
Starting 7006
Now we are ready to configure the six nodes as a cluster.
Create the cluster:
./create-cluster create
You should see the following output as the cluster configuration is generated:
>>> Performing hash slots allocation on 6 nodes...
Master[0] -> Slots 0 - 5460
Master[1] -> Slots 5461 - 10922
Master[2] -> Slots 10923 - 16383
Adding replica 127.0.0.1:7005 to 127.0.0.1:7001
Adding replica 127.0.0.1:7006 to 127.0.0.1:7002
Adding replica 127.0.0.1:7004 to 127.0.0.1:7003
>>> Trying to optimize slaves allocation for anti-affinity
[WARNING] Some slaves are in the same host as their master
M: cf10723420c411b32ebcd7a50a724fa1bb00add0 127.0.0.1:7001
   slots:[0-5460] (5461 slots) master
M: f563c0cc983f181d8fde839f3508d52f1905b96e 127.0.0.1:7002
   slots:[5461-10922] (5462 slots) master
M: 36f2de71920d07030b93e4e1bd7c49afc1a26276 127.0.0.1:7003
   slots:[10923-16383] (5461 slots) master
S: fd872ad38d305ab067a86eacc33775b362feed0e 127.0.0.1:7004
   replicates f563c0cc983f181d8fde839f3508d52f1905b96e
S: 3115b82336b10f57de1a6936cff93a8e45df777f 127.0.0.1:7005
   replicates 36f2de71920d07030b93e4e1bd7c49afc1a26276
S: 17bb709ba3af5311e44fc408d3f44979bae1f1dc 127.0.0.1:7006
   replicates cf10723420c411b32ebcd7a50a724fa1bb00add0
You will be prompted to accept the configuration that is displayed, if everything looks correct answer “yes”
Can I set the above configuration? (type 'yes' to accept): yesThen you should see the following output as the cluster configuration is applied:
>>> Nodes configuration updated
>>> Assign a different config epoch to each node
>>> Sending CLUSTER MEET messages to join the cluster
Waiting for the cluster to join
.
>>> Performing Cluster Check (using node 127.0.0.1:7001)
M: cf10723420c411b32ebcd7a50a724fa1bb00add0 127.0.0.1:7001
   slots:[0-5460] (5461 slots) master
   1 additional replica(s)
S: 17bb709ba3af5311e44fc408d3f44979bae1f1dc 127.0.0.1:7006
   slots: (0 slots) slave
   replicates cf10723420c411b32ebcd7a50a724fa1bb00add0
M: 36f2de71920d07030b93e4e1bd7c49afc1a26276 127.0.0.1:7003
   slots:[10923-16383] (5461 slots) master
   1 additional replica(s)
S: 3115b82336b10f57de1a6936cff93a8e45df777f 127.0.0.1:7005
   slots: (0 slots) slave
   replicates 36f2de71920d07030b93e4e1bd7c49afc1a26276
S: fd872ad38d305ab067a86eacc33775b362feed0e 127.0.0.1:7004
   slots: (0 slots) slave
   replicates f563c0cc983f181d8fde839f3508d52f1905b96e
M: f563c0cc983f181d8fde839f3508d52f1905b96e 127.0.0.1:7002
   slots:[5461-10922] (5462 slots) master
   1 additional replica(s)
[OK] All nodes agree about slots configuration.
>>> Check for open slots...
>>> Check slots coverage...
[OK] All 16384 slots covered.
The cluster should now be configured and running.
You can view the list of nodes in the cluster by running the following command:
redis-cli -p 7001 cluster nodes
17bb709ba3af5311e44fc408d3f44979bae1f1dc 127.0.0.1:7006@17006 slave cf10723420c411b32ebcd7a50a724fa1bb00add0 0 1625887492326 6 connected
36f2de71920d07030b93e4e1bd7c49afc1a26276 127.0.0.1:7003@17003 master - 0 1625887492326 3 connected 10923-16383
3115b82336b10f57de1a6936cff93a8e45df777f 127.0.0.1:7005@17005 slave 36f2de71920d07030b93e4e1bd7c49afc1a26276 0 1625887492126 5 connected
cf10723420c411b32ebcd7a50a724fa1bb00add0 127.0.0.1:7001@17001 myself,master - 0 1625887492000 1 connected 0-5460
fd872ad38d305ab067a86eacc33775b362feed0e 127.0.0.1:7004@17004 slave f563c0cc983f181d8fde839f3508d52f1905b96e 0 1625887492025 4 connected
f563c0cc983f181d8fde839f3508d52f1905b96e 127.0.0.1:7002@17002 master - 0 1625887492025 2 connected 5461-10922
That is it, the cluster is now ready!
Useful Cluster Commands
Here are some common commands you will use when working with your new Redis cluster.
Starting a cluster
Here is the start cluster command:
./create-cluster start
When the cluster is started successfully you should see the following output:
root@mycomputer:/opt/redis-5.0.12/utils/create-cluster# ./create-cluster start
Starting 7001
Starting 7002
Starting 7003
Starting 7004
Starting 7005
Starting 7006
Stopping a cluster
Here is the stop cluster command:
./create-cluster stop
When the cluster is stopped you should see the following output:
root@mycompouter:/opt/redis-5.0.12/utils/create-cluster# ./create-cluster stop
Stopping 7001
Stopping 7002
Stopping 7003
Stopping 7004
Stopping 7005
Stopping 7006
Removing a cluster
If you need to remove the existing cluster for some reason you can run the following command:
./create-cluster clean